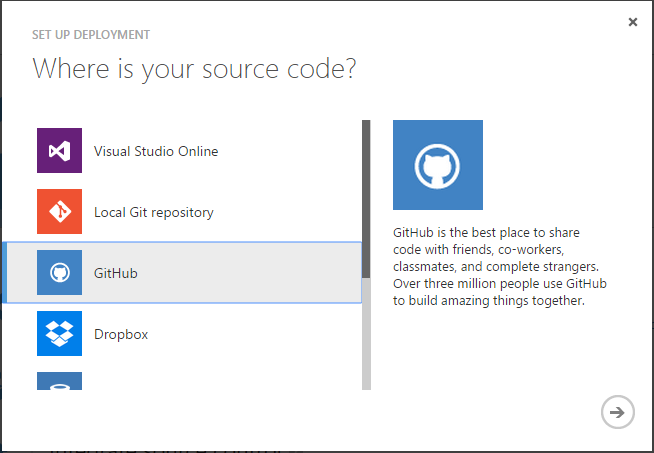
Using Azure Platform, create a new APP Of sitecore.
Sitecore team has done quiet an extensive work, so that entire platform is available on Azure.
The process usually takes around 30 minutes.
In the Wizard provided by Azure, you will have options to where you would store
sql databases and mongo.
For our demo process, we will use SQL Server and Databases of Azure. In the local environment, we will use local solr and for azure we will spin up a virtual machine where solr can be hosted.
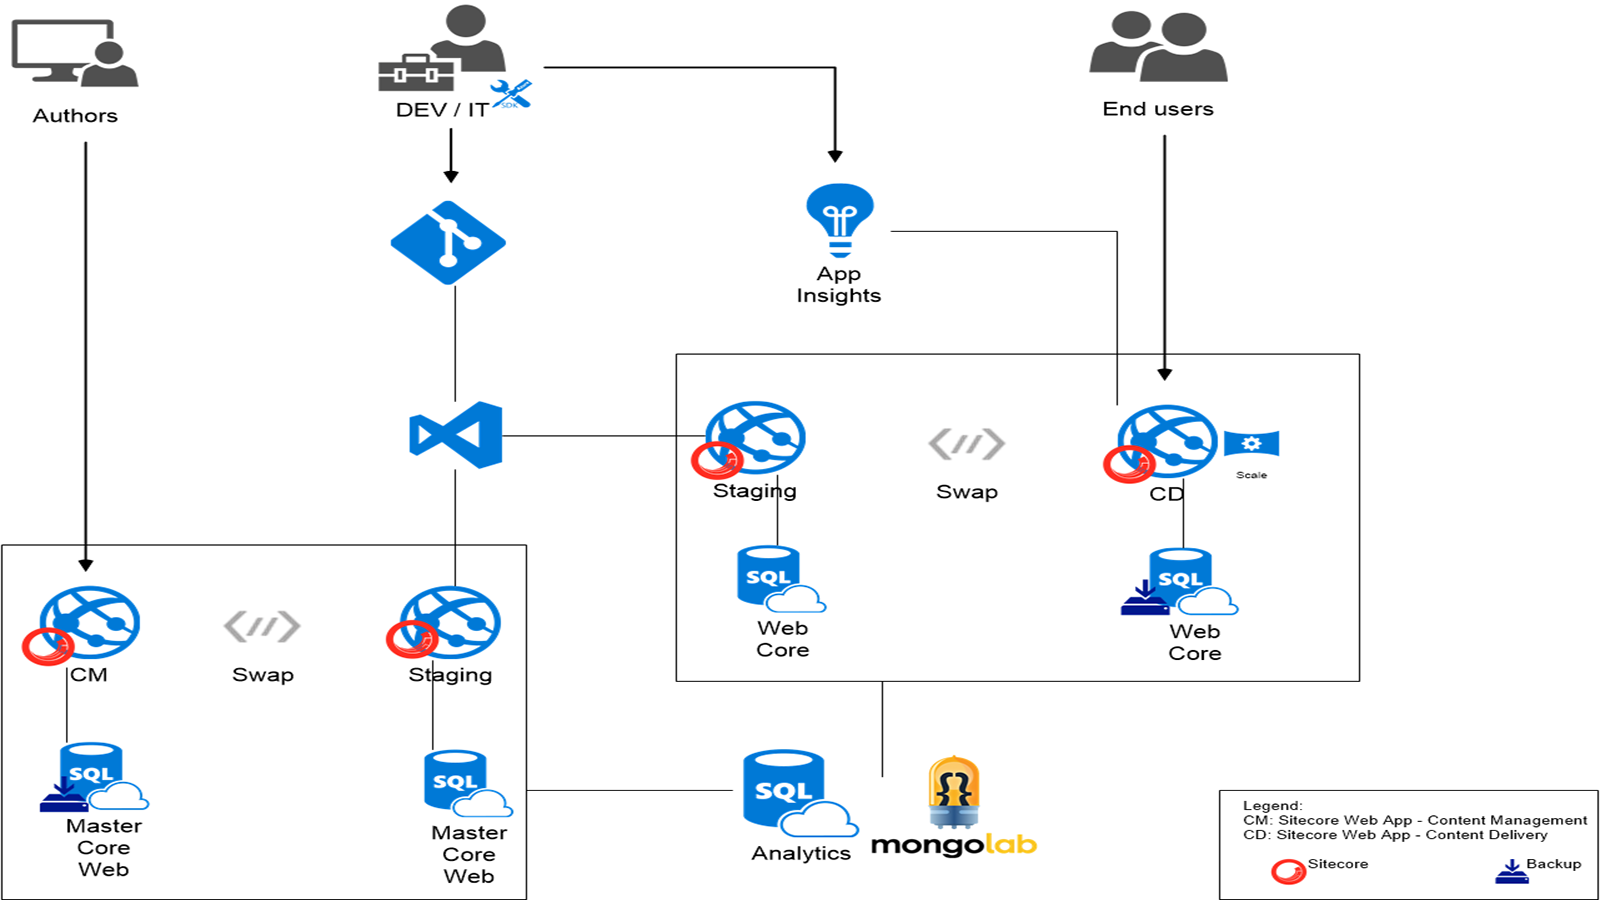
Our architecture ensures the content delivery running 100%. They will be no down time even during new projects and features deployment.
The process start with Local development or Team Development depending on the initial set up. Once the deployment phase is accomplished, it will be pushed and synchronized to the Staging or QA environment.CM and CD environment will be independent of any changes. With the power of Azure, slot swapping will maintain the availability of the sites.
There are many source control tools available nowadays. Depending on the type of project and the team culture, source control will be chosen. Each tool has many positive features. Azure Team did a good job opening the options to any source control used.
For our application, we will use bitbucket as the source control. We choose to use bitbucket, because it can easily be integrated with Jira and Team City.
Start with Empty and clean repository, we will filled it later with all necessary files. Don’t forget to Clone it locally.

In order to synchronize development, staging and production,
we have to be running on the same version of sitecore.
The only variation between these environments should be controlled by the set up deployment branching versioning of the source control.
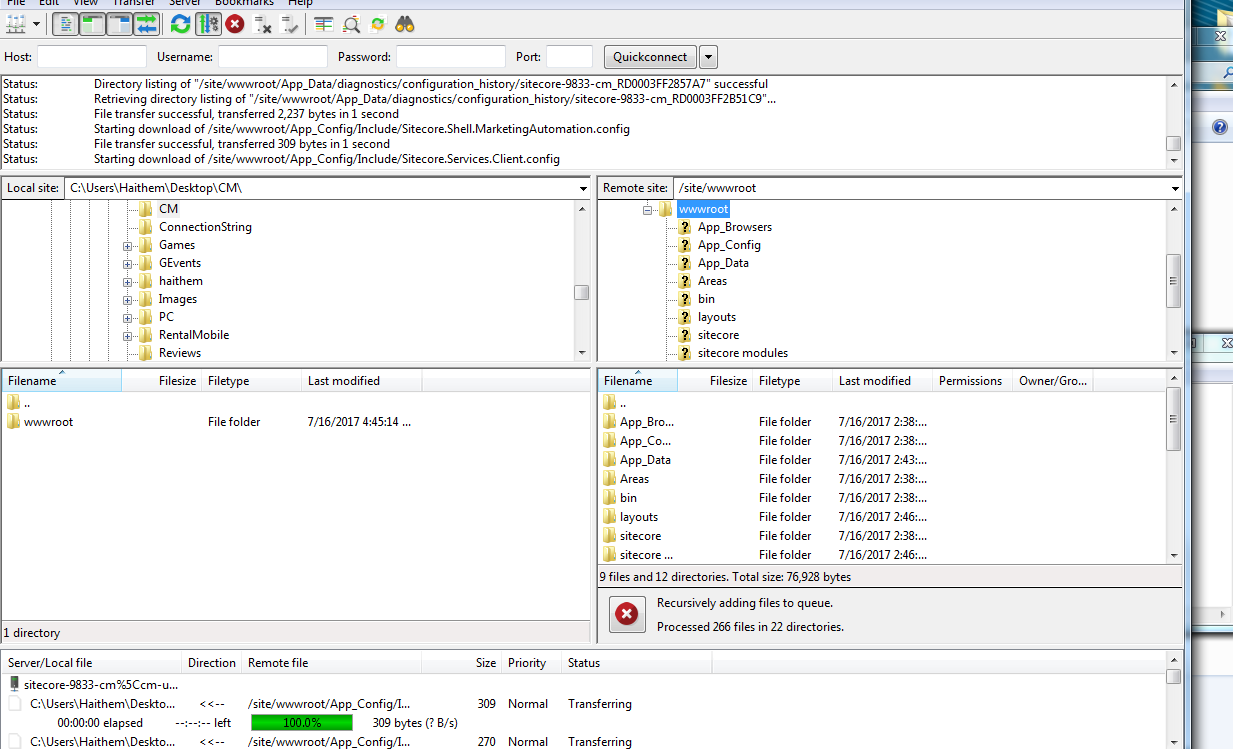
Install and run empty sitecore instance in your local machine.We will use FileZilla to download the entire solution To Temp Folder.
Then, copy and Paste and Override into the intepub instance
The source control has to match exactly what is on content delivery. Having the exact match facilitate management replication of the environment. In addition, we will have a concrete base line for the running site.
When we finish this task, we are one step close to complete the synchronization between the environments.
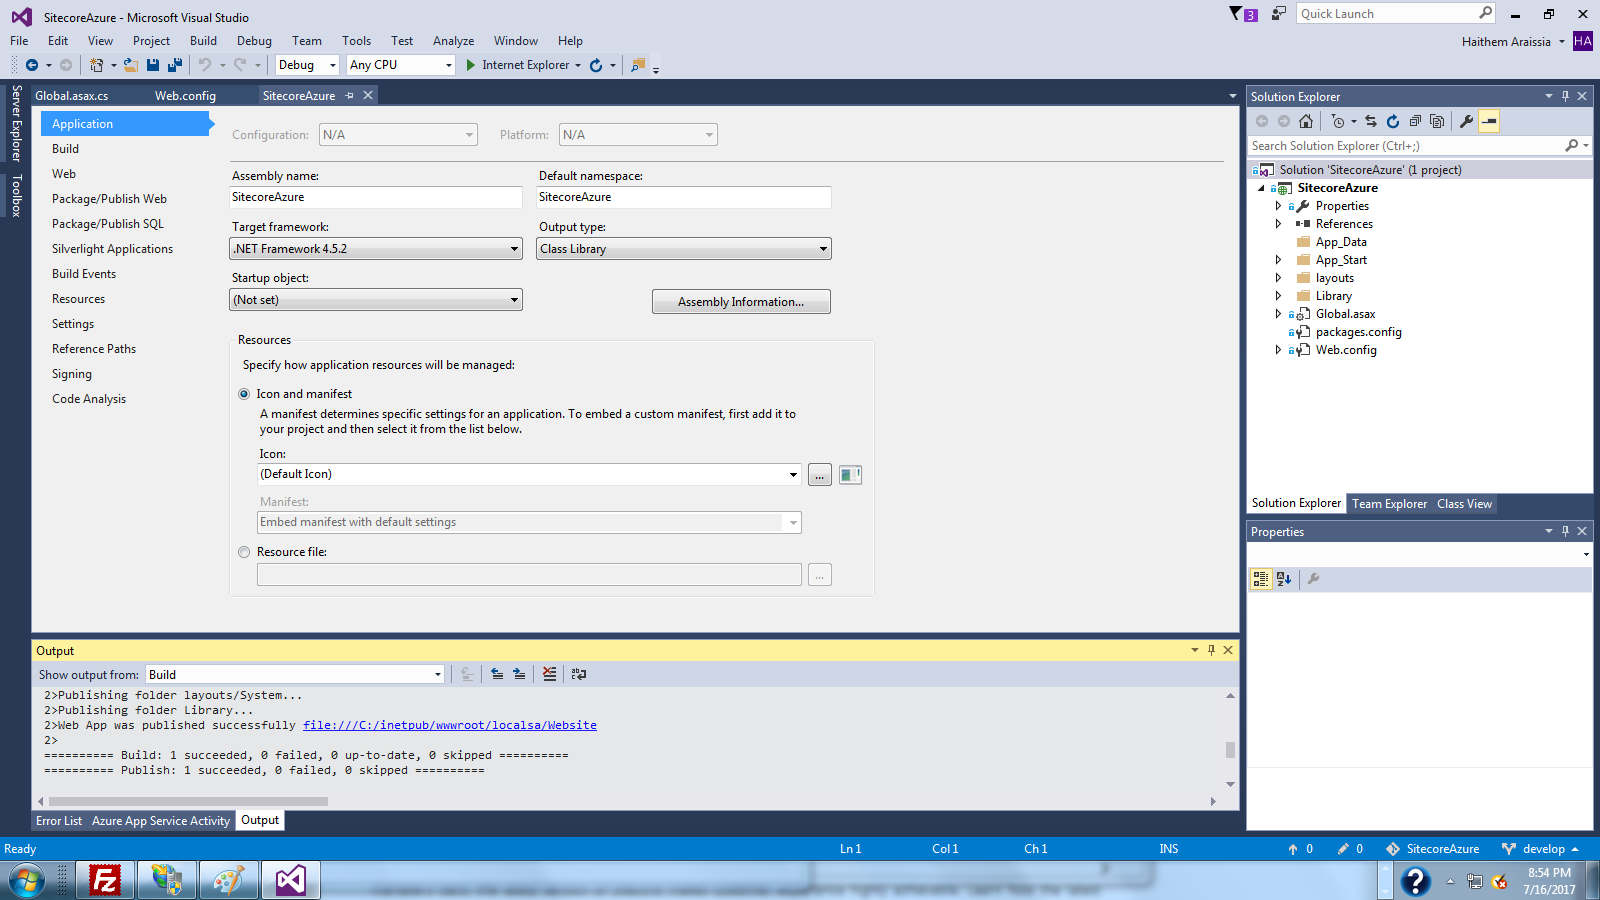
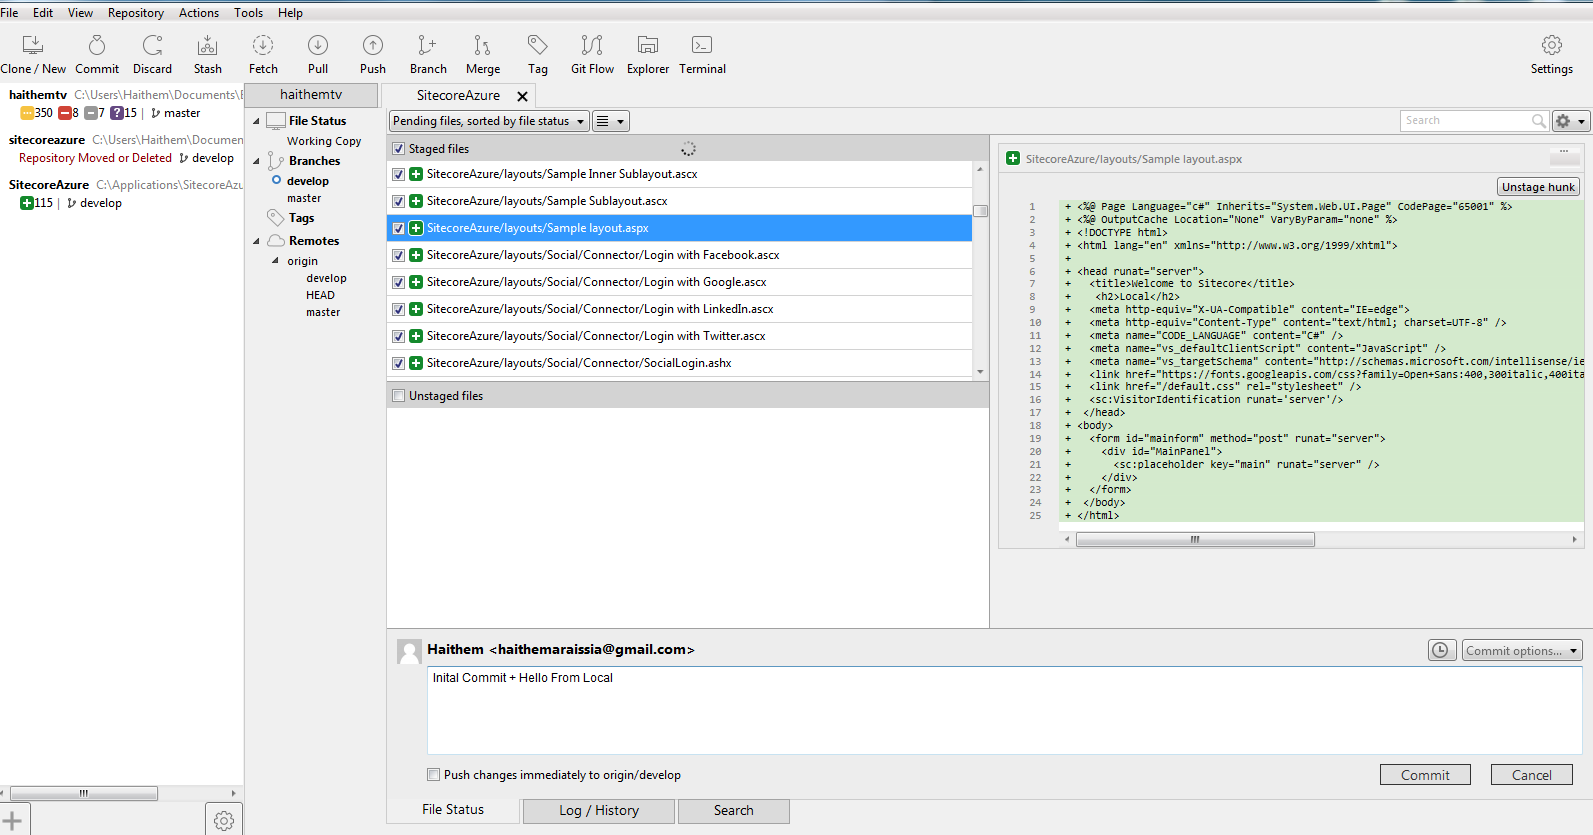
Create an empty Asp.net Web Application. Copy and Paste into the solution, the files and folders from FileZilla Folder. Run it and set the publishing profile to your local sitecore Instance.
If you have any problems building the solution, always check the framework version.
Each sitecore solution is built on a different .net framework. Always match the framework of the solution exposed in azure marketplace.
In our scenario, it will be 4.5.2.
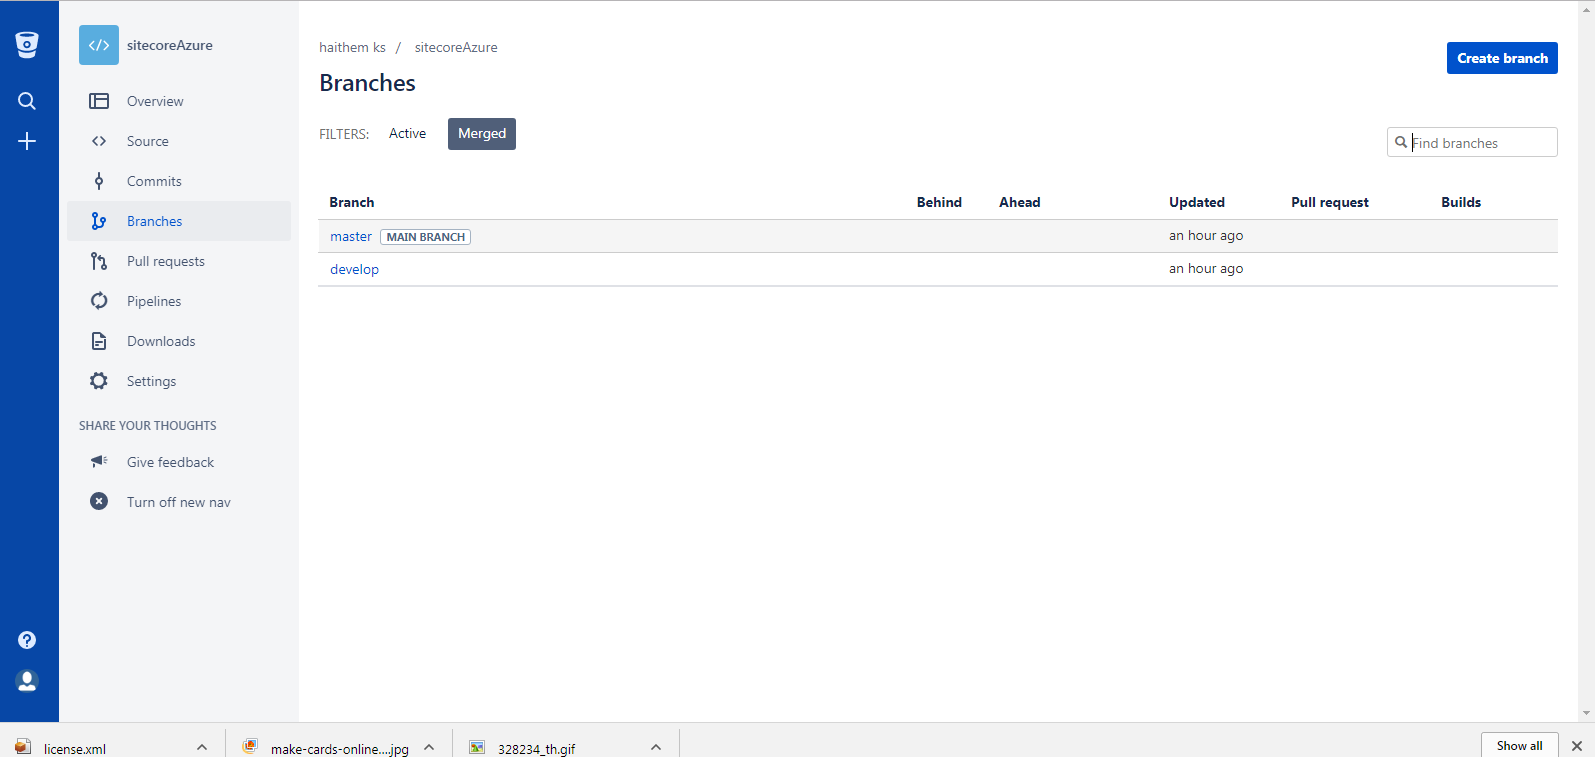
The school of thought for the code repository is that branches are supposed to be interconnected based on environment and feature requests. For our demo, we will manage to impose the following:
We need to create develop branch and switch to it locally.
At this stage, we need to create a local configuration setting in the solution and add all the files downloaded to the solution. The next step will be to committing these changes.
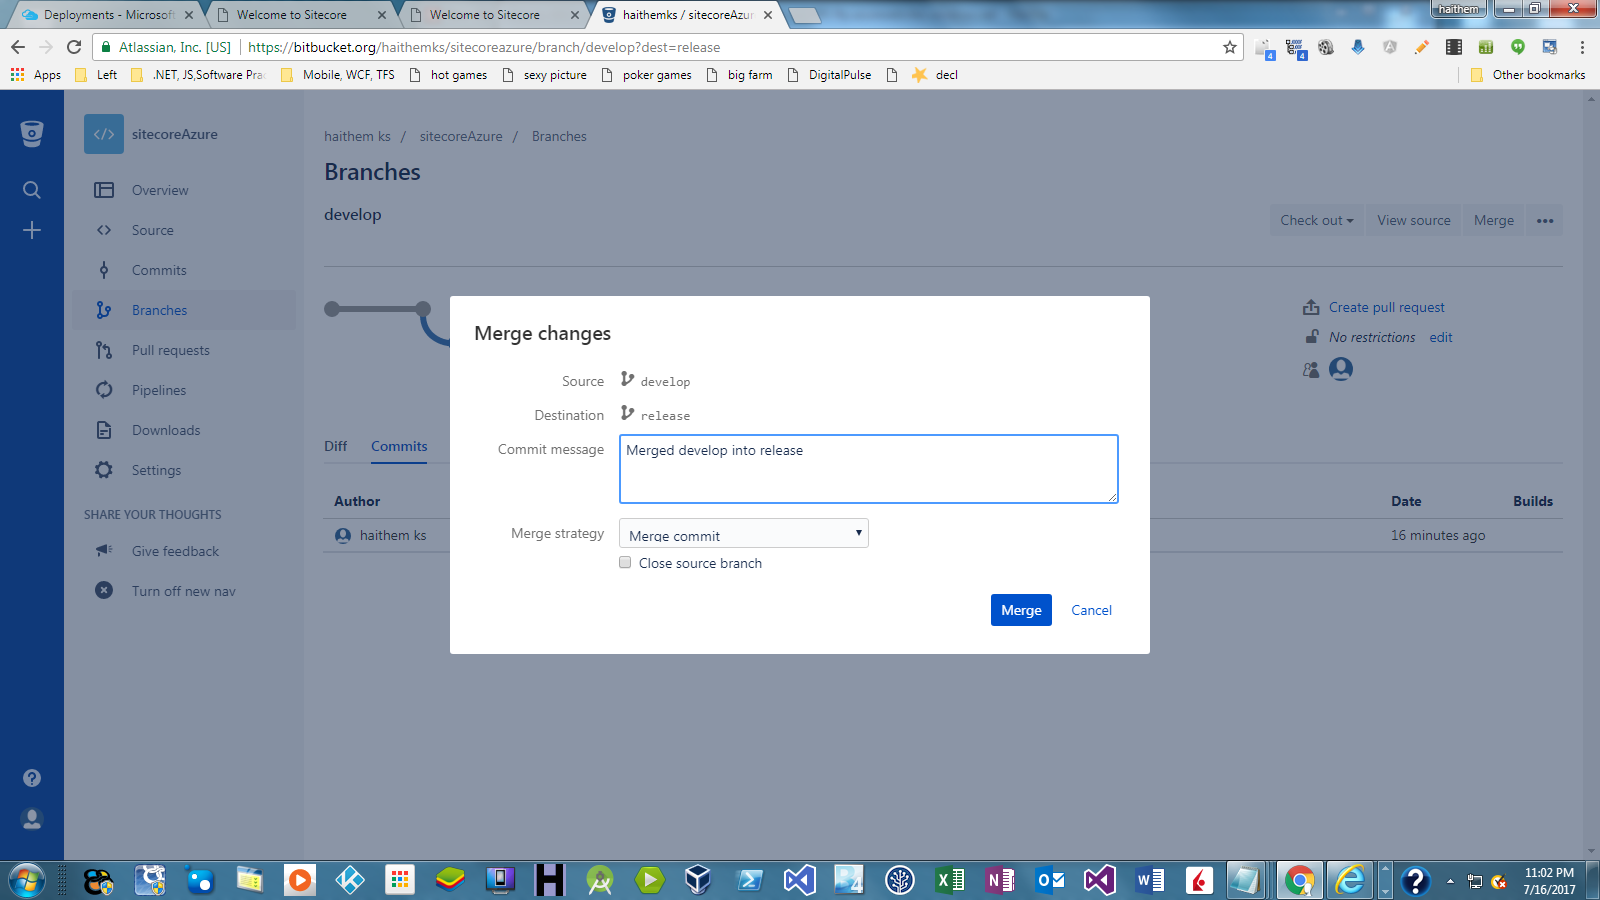
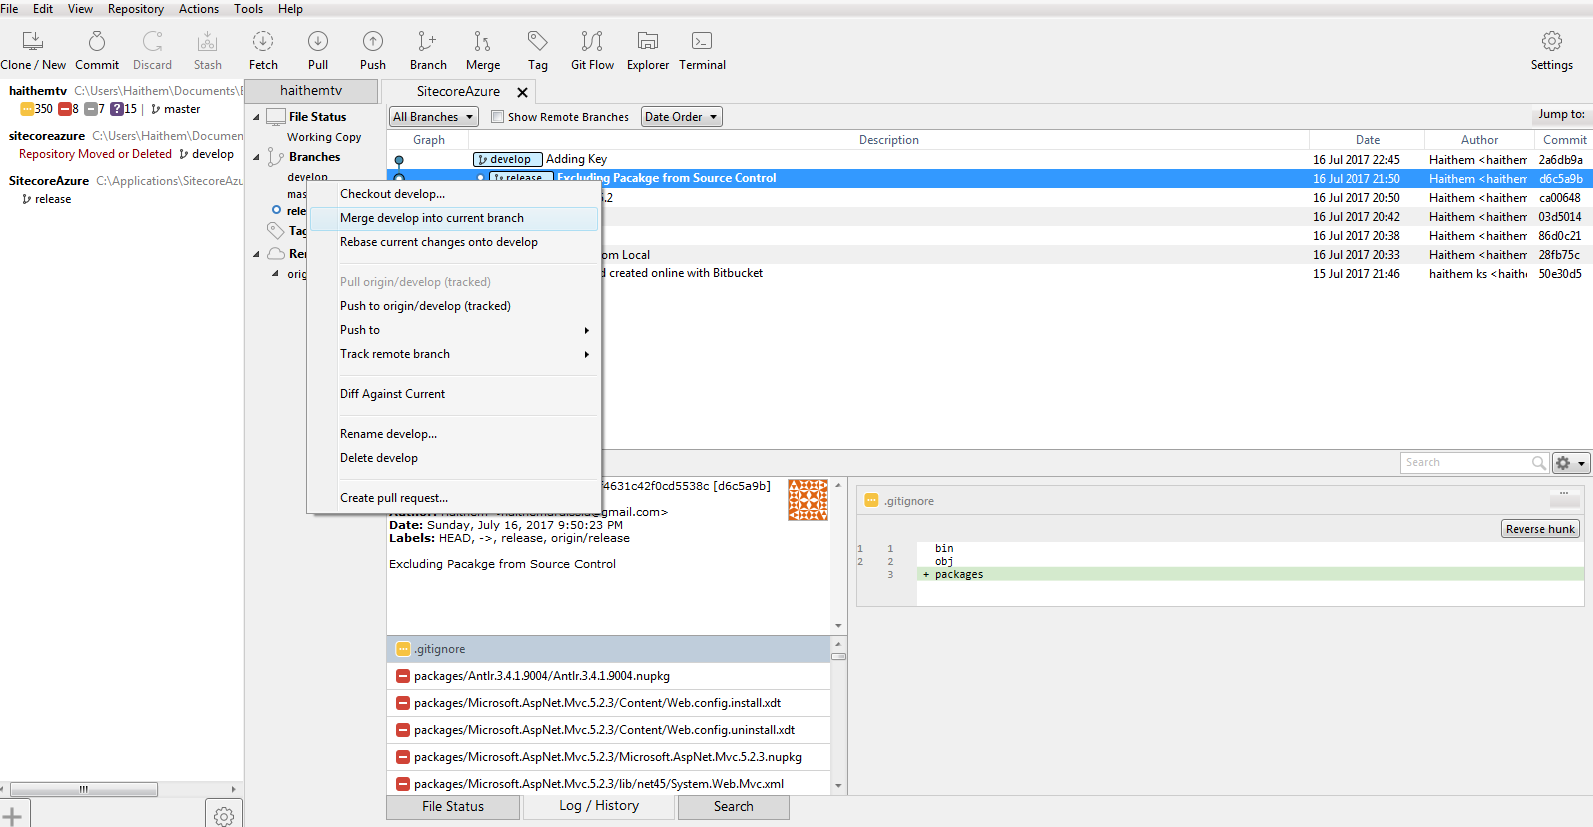
Since, we are still in the warming up phase, we will merge the develop branch into the master branch.This commit will be our base line commit for all environments.
All environments will be running other features where the baseline is this commit.
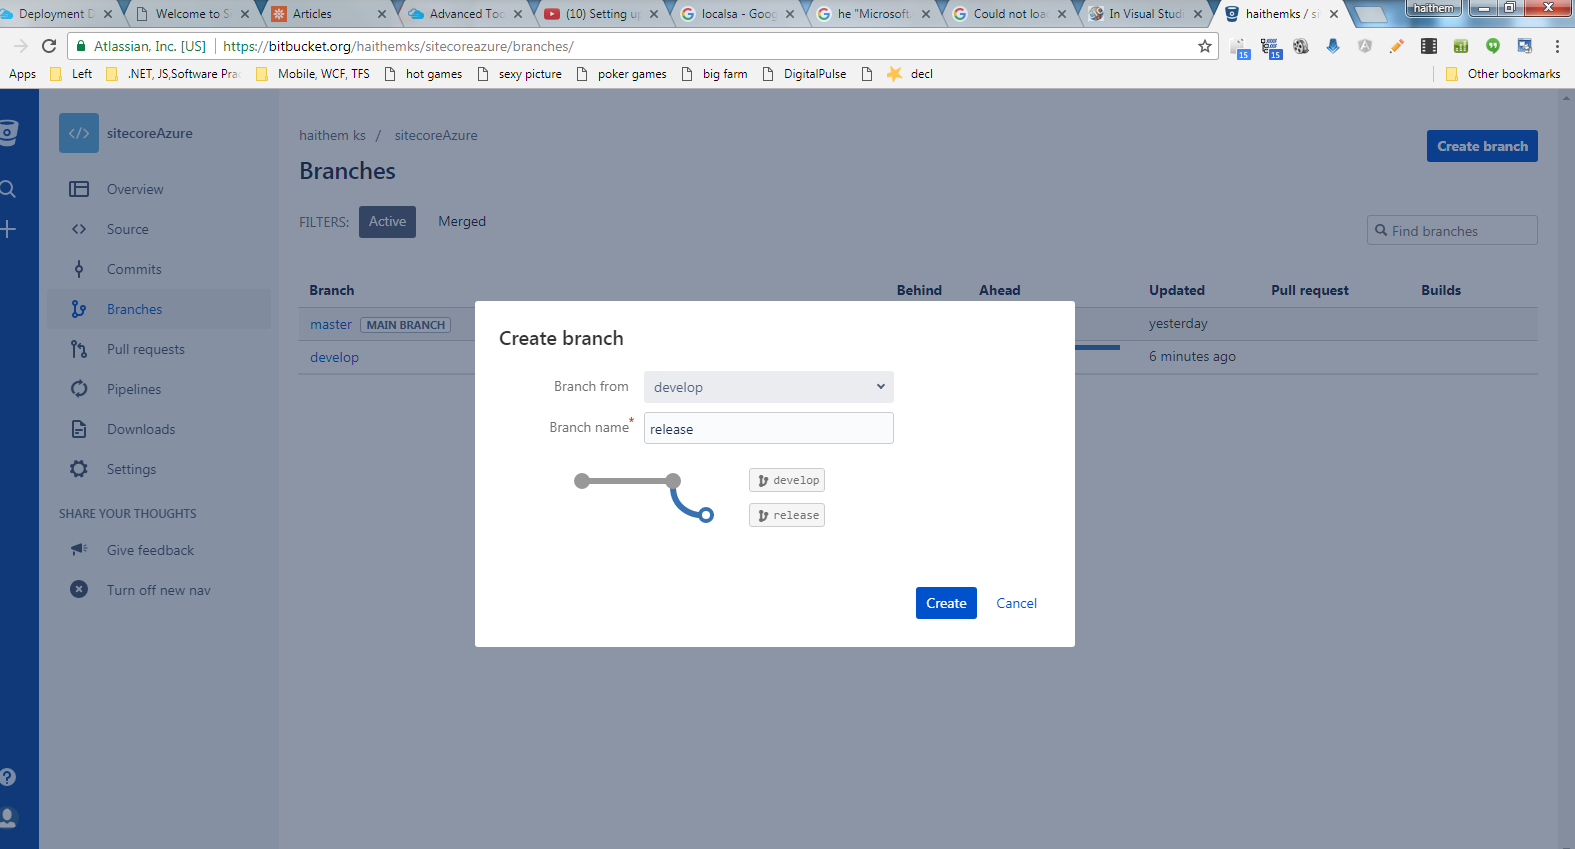
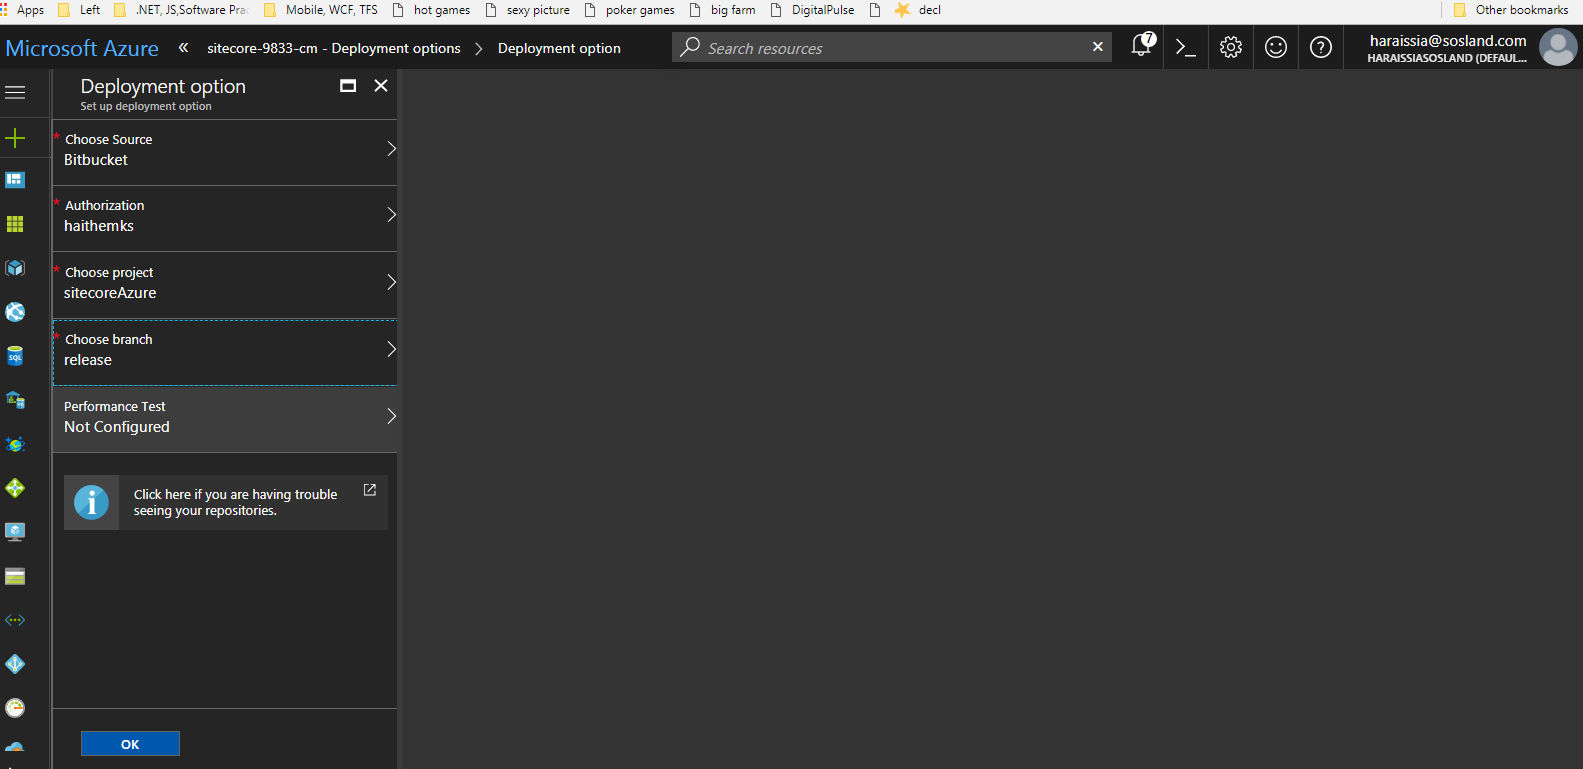
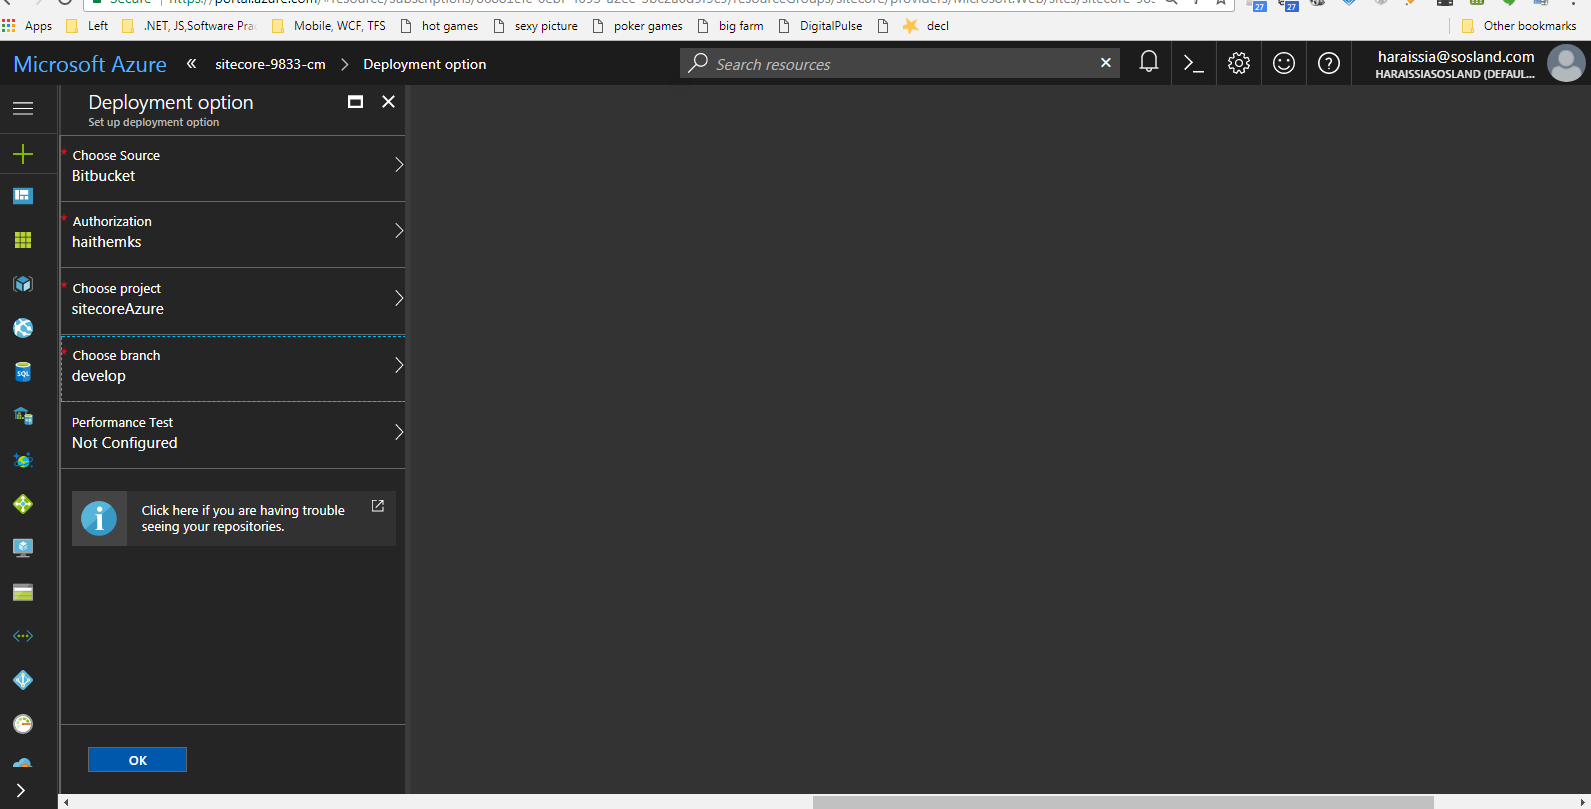
Each environment will be hocked into specific branch.
In this step, we will hock release branch to CM environment. Then, you can follow the same procedure to hock Staging and Production Environment.
We will create a release branch.
We will set the Source control of CM in Azure to the Release Branch.